by Henry M. Votel, Forest Lake, MN.
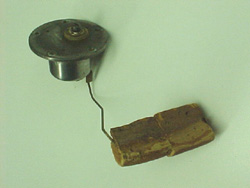
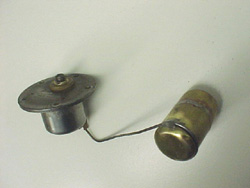
The fuel sending unit on my 1954 Studebaker Champion worked but did not read accurately after 50+ years of use. My suspicions were confirmed when I removed the gas tank for a cleaning in the Winter of 2006-07. After all those years and the newer formulations of gas there was no trace of the original shellac coating on the cork floats. Just holding them in my hand confirmed they were soaked and this caused them to be sinking when the tank was filled. The gauge never showed it above 3/4’s full. A few days later after the corks dried they were very light.
Chatting with others and reading the few internet search results I could find had suggestions ranging from getting new corks from the hardware store to coating corks with modern sealers as a fix. Not thinking these very good solutions I kept searching and came across references and suggestions about replacing brass floats on sending units. that sounded like the thing to do. I started checking for brass floats, found a few on eBay and along the way saw some plastic floats used on newer sending units.
I came across a reference at the Imperial Club web pages that gave a reference to a Ford Part number: http://www.imperialclub.com/Repair/Fuel/sending.htm
After checking with local auto stores on the part number I contacted my local Ford Parts and these floats were available for less than $7.50 including sales tax. . . . right down my alley. I picked up an order of 4 a few days later. I will need them for other Studebaker tanks.
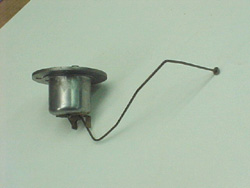
Here’s what I did to substitute the cork floats with a brass float:
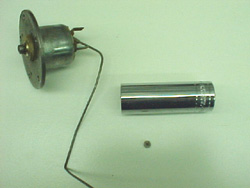
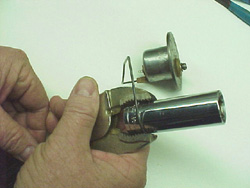
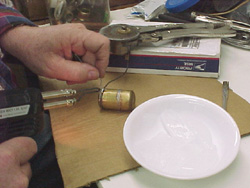
First I cleaned the unit and then removed the old cork floats.
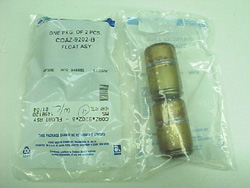
This is the Ford Float. Part No
COAZ-9202-B about 2-1/2 inches long. They came two in a pack. You can
just buy one though.
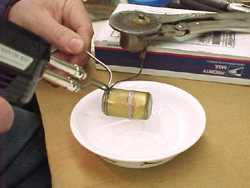
Be careful not to upset the original arm from the float as you bend the circle. Once I had the circle I had to bend it 90° to get the wire oriented properly. Your float me be different so adjust as needed. I was hoping the metal wire would not break. Lucky for me it did not. If it had I would have had to solder or weld the wires together.
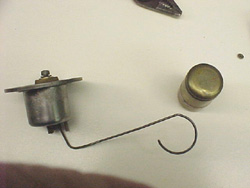
After bending it I had the proper
orientation. I tightened the circle so it clipped onto the Ford
float tightly. This float was manufactured with an indented ridge at
one end for the wire to ride in and that works just right for this
situation.
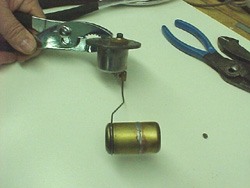
I had to twist the float a bit to make sure it would be level when it lowered and rose.
Not trusting my circled wire clamp to hold forever I decided to solder the float on at two points. If you start soldering on the float you’ll notice it gets very hot quickly because it is very thin brass. I set it onto some ice in a bowl and that helped keep it cool. I soldered slowly, getting a dab of solder on, then letting it cool before melting it again and finally finishing. Don’t forget to flux and don’t rush.
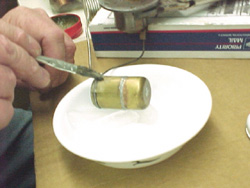
Keep the float cool. Too much heat and it will burst.
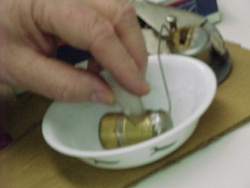
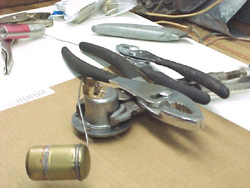
The finished soldering added strength and it was secured to the float wire.
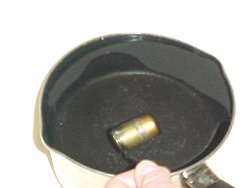
Lastly a water test for any bubbles from leaks. Had none. Good Job!
––––––––––––––––––––––––––––––––––––––––––––––––––––––––––––––––––––––––––––––
Demo, bending, twisting, soldering, icing and chit chat by Henry M. Votel.
Pics, web page work up and questions by my son Henry B. Votel.

Demo, bending, twisting, soldering, icing and chit chat by Henry M. Votel.
Pics, web page work up and questions by my son Henry B. Votel.